ShopDreamUp AI ArtDreamUp
Deviation Actions


![Last summer in the Hokunava forest [Kuroi Okami]](https://images-wixmp-ed30a86b8c4ca887773594c2.wixmp.com/f/fd575786-4127-4474-9cd0-627e2830799a/ddz10s9-e36583cc-74f6-4e7a-958d-e75fe75127ce.png/v1/crop/w_184,h_184,x_36,y_0,scl_0.10900473933649,q_70,strp/last_summer_in_the_hokunava_forest__kuroi_okami__by_moro_no_mori_ddz10s9-92s-2x.jpg?token=eyJ0eXAiOiJKV1QiLCJhbGciOiJIUzI1NiJ9.eyJzdWIiOiJ1cm46YXBwOjdlMGQxODg5ODIyNjQzNzNhNWYwZDQxNWVhMGQyNmUwIiwiaXNzIjoidXJuOmFwcDo3ZTBkMTg4OTgyMjY0MzczYTVmMGQ0MTVlYTBkMjZlMCIsIm9iaiI6W1t7ImhlaWdodCI6Ijw9MTY4OCIsInBhdGgiOiJcL2ZcL2ZkNTc1Nzg2LTQxMjctNDQ3NC05Y2QwLTYyN2UyODMwNzk5YVwvZGR6MTBzOS1lMzY1ODNjYy03NGY2LTRlN2EtOTU4ZC1lNzVmZTc1MTI3Y2UucG5nIiwid2lkdGgiOiI8PTMwMDAifV1dLCJhdWQiOlsidXJuOnNlcnZpY2U6aW1hZ2Uub3BlcmF0aW9ucyJdfQ.Vpt2U-WnBX4TlNEpGYmd8DpPMlh7zfcsuO844idKyeE)
![Last summer in the Hokunava forest [Kuroi Okami]](https://images-wixmp-ed30a86b8c4ca887773594c2.wixmp.com/f/fd575786-4127-4474-9cd0-627e2830799a/ddz10s9-e36583cc-74f6-4e7a-958d-e75fe75127ce.png/v1/crop/w_92,h_92,x_18,y_0,scl_0.054502369668246,q_70,strp/last_summer_in_the_hokunava_forest__kuroi_okami__by_moro_no_mori_ddz10s9-92s.jpg?token=eyJ0eXAiOiJKV1QiLCJhbGciOiJIUzI1NiJ9.eyJzdWIiOiJ1cm46YXBwOjdlMGQxODg5ODIyNjQzNzNhNWYwZDQxNWVhMGQyNmUwIiwiaXNzIjoidXJuOmFwcDo3ZTBkMTg4OTgyMjY0MzczYTVmMGQ0MTVlYTBkMjZlMCIsIm9iaiI6W1t7ImhlaWdodCI6Ijw9MTY4OCIsInBhdGgiOiJcL2ZcL2ZkNTc1Nzg2LTQxMjctNDQ3NC05Y2QwLTYyN2UyODMwNzk5YVwvZGR6MTBzOS1lMzY1ODNjYy03NGY2LTRlN2EtOTU4ZC1lNzVmZTc1MTI3Y2UucG5nIiwid2lkdGgiOiI8PTMwMDAifV1dLCJhdWQiOlsidXJuOnNlcnZpY2U6aW1hZ2Uub3BlcmF0aW9ucyJdfQ.Vpt2U-WnBX4TlNEpGYmd8DpPMlh7zfcsuO844idKyeE)


Description
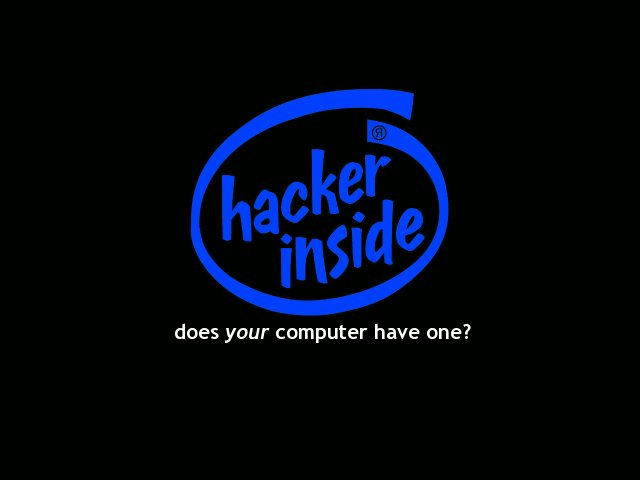
The "Hacker Inside" logo is a parody I did many years ago that I went into obsessive-compulsive overdrive on making the font as perfect as possible. Probably the best parody of the old Intel image I've ever seen on the Internet.
It is a parody. No one get excited.
I recently added the white text to the bottom to make the parody more complete, and matched the colors up. Then because Gimp has some weird bug with PCX files (who the heck uses this format anymore anyway?) exported it as a 256-color Bitmap and then used i-Mage under WinXP as a hack-and-slash way to convert it to a sane PCX file.
Why? Because many newer motherboards (notably those with AWARD and AMI BIOS), including the MSI-6712 I have, now support customized full-screen boot logos to hide the POST data with (unless, of course, POST finds a problem).
Now, if you don't know already about to flash your BIOS, just appreciate the artwork and move on. Messing with your BIOS can render your computer useless. If you screw up, you may have to just replace the motherboard. Don't do ANYTHING I talk about here.
If you know what you're doing, grab the latest BIOS for your motherboard, and get cracking. A lot of ASUS boards come with a utility to do this, but MSI is a little more persnickety about giving out something like that, so here's how to do it with just about any recent AMI BIOS board that supports splash screens. FIRST, there's a chance things can go wrong without warning and ruin you even if you know what you're doing, so with your trusty BIOS boot disk handy, flash your BIOS normally once as a test. Now write protect this floppy disk, and then make a copy of it... Work with this first copy from now on.
Now, with this first copy, rename the BIOS ROM image to AMIBOOT.ROM if it's not named that already, and let's do a second test. The test that shows you know how to use the _emergency flash bootstrap_ on your motherboard. Put this new floppy in the drive, and turn the machine OFF. Now, with one hand poised over the CTRL and HOME keys, and the other over the power switch, try to turn on the computer with the power button at the same time you press CTRL+HOME. Generally the easier way to do this is just use one hand to madly press CTRL and HOME at the same time over and over as fast as you can, then hit the power button with your other hand (or have a friend do it) while you keep hitting those keys for a second or two more. The computer will beep once, and then begin reading the floppy disk. It is now automatically burn whatever is named AMIBOOT.ROM from that floppy disk onto the BIOS, which takes less than a minute. When it is done, it will give four more short beeps, and it will reboot. Note, flashing your BIOS in this way is literally guaranteed to scramble your configuration. No biggie. Power off and reboot the machine normally, hitting DEL (or waiting for the BIOS to gripe about the scrambled data and asking you to hit a different key) to get into the editor and ALWAYS pick "Load SETUP Defaults" first to set all the settings to "sane" values, including the *hidden* ones that you can never see that can wreck your day. Next go through and set all your settings to the proper values (clock speed, disabling/enabling onboard things, etc). Reboot again. If your motherboard does this (and some newer AWARD boards do, too, using a different set of keys) then you can always recover from a screwup with this disk. Write protect it, and make a copy of it (skip this step if your image was already named AMIBOOT.ROM). Use this third copy for the next step.
Now the FUN part.
Obtain AMIBCP (Google search "AMIBCP download") of which I am using version 7.51.something or other. Run AMIBCP and tell it to load A:\AMIBOOT.ROM (obviously). Now, scroll down and look for module 33 Full Screen Logo. You can hit Space to export it as a PCX file so you can have a template to start with if you like. Hit Delete to get rid of this module, and enter to confirm. Now, hit Insert, and tell it the location of the PCX file you want to replace it with. Almost ANY 640x480x256 PCX file will do, but it's picky sometimes. Don't go crazy with detail because it can make the PCX file too large. The limit is whenever AMIBCP says it's too big. (Wink)") If it says "File not found" it means it doesn't like your file. If it does like your file, you'll now be looking at where you set what type of module it is... Change it to say 33 Full Screen Logo, and right below that, turn compression ON. Hit escape to get out of there, confirming along the way, to get back to the main menu. Tell it to save the BIOS image to a file... A:\AMIBOOT.ROM for instance.
If it says "File not found" it means it doesn't like your file. If it does like your file, you'll now be looking at where you set what type of module it is... Change it to say 33 Full Screen Logo, and right below that, turn compression ON. Hit escape to get out of there, confirming along the way, to get back to the main menu. Tell it to save the BIOS image to a file... A:\AMIBOOT.ROM for instance.
Now you have a floppy with your new BIOS on it. Use whichever method you prefer to flash your BIOS again. You're done. Store those floppies in a cool, dark place as per usual.
It is a parody. No one get excited.
I recently added the white text to the bottom to make the parody more complete, and matched the colors up. Then because Gimp has some weird bug with PCX files (who the heck uses this format anymore anyway?) exported it as a 256-color Bitmap and then used i-Mage under WinXP as a hack-and-slash way to convert it to a sane PCX file.
Why? Because many newer motherboards (notably those with AWARD and AMI BIOS), including the MSI-6712 I have, now support customized full-screen boot logos to hide the POST data with (unless, of course, POST finds a problem).
Now, if you don't know already about to flash your BIOS, just appreciate the artwork and move on. Messing with your BIOS can render your computer useless. If you screw up, you may have to just replace the motherboard. Don't do ANYTHING I talk about here.
If you know what you're doing, grab the latest BIOS for your motherboard, and get cracking. A lot of ASUS boards come with a utility to do this, but MSI is a little more persnickety about giving out something like that, so here's how to do it with just about any recent AMI BIOS board that supports splash screens. FIRST, there's a chance things can go wrong without warning and ruin you even if you know what you're doing, so with your trusty BIOS boot disk handy, flash your BIOS normally once as a test. Now write protect this floppy disk, and then make a copy of it... Work with this first copy from now on.
Now, with this first copy, rename the BIOS ROM image to AMIBOOT.ROM if it's not named that already, and let's do a second test. The test that shows you know how to use the _emergency flash bootstrap_ on your motherboard. Put this new floppy in the drive, and turn the machine OFF. Now, with one hand poised over the CTRL and HOME keys, and the other over the power switch, try to turn on the computer with the power button at the same time you press CTRL+HOME. Generally the easier way to do this is just use one hand to madly press CTRL and HOME at the same time over and over as fast as you can, then hit the power button with your other hand (or have a friend do it) while you keep hitting those keys for a second or two more. The computer will beep once, and then begin reading the floppy disk. It is now automatically burn whatever is named AMIBOOT.ROM from that floppy disk onto the BIOS, which takes less than a minute. When it is done, it will give four more short beeps, and it will reboot. Note, flashing your BIOS in this way is literally guaranteed to scramble your configuration. No biggie. Power off and reboot the machine normally, hitting DEL (or waiting for the BIOS to gripe about the scrambled data and asking you to hit a different key) to get into the editor and ALWAYS pick "Load SETUP Defaults" first to set all the settings to "sane" values, including the *hidden* ones that you can never see that can wreck your day. Next go through and set all your settings to the proper values (clock speed, disabling/enabling onboard things, etc). Reboot again. If your motherboard does this (and some newer AWARD boards do, too, using a different set of keys) then you can always recover from a screwup with this disk. Write protect it, and make a copy of it (skip this step if your image was already named AMIBOOT.ROM). Use this third copy for the next step.
Now the FUN part.
Obtain AMIBCP (Google search "AMIBCP download") of which I am using version 7.51.something or other. Run AMIBCP and tell it to load A:\AMIBOOT.ROM (obviously). Now, scroll down and look for module 33 Full Screen Logo. You can hit Space to export it as a PCX file so you can have a template to start with if you like. Hit Delete to get rid of this module, and enter to confirm. Now, hit Insert, and tell it the location of the PCX file you want to replace it with. Almost ANY 640x480x256 PCX file will do, but it's picky sometimes. Don't go crazy with detail because it can make the PCX file too large. The limit is whenever AMIBCP says it's too big.
Now you have a floppy with your new BIOS on it. Use whichever method you prefer to flash your BIOS again. You're done. Store those floppies in a cool, dark place as per usual.
© 2004 - 2024 evilDagmarX
Comments6
Join the community to add your comment. Already a deviant? Log In
actually this will be great bootlogo for hacked nintendo switch.